Did you know that snacking on protein-rich foods can actually reduce your late-night sugar cravings by nearly 50%? I’ve spent years trying to find that “holy grail” snack that tastes like a dessert but performs like a workout supplement. Honestly, I used to just grab a candy bar when I was tired. Big mistake! It always led to a crash. Then I discovered the magic of chocolate peanut butter protein balls. They are fast. They are filling. And they taste exactly like those expensive buckeye candies, but they won’t leave you feeling like a slug. Let’s get into why these are a total game-changer for your meal prep routine this year!
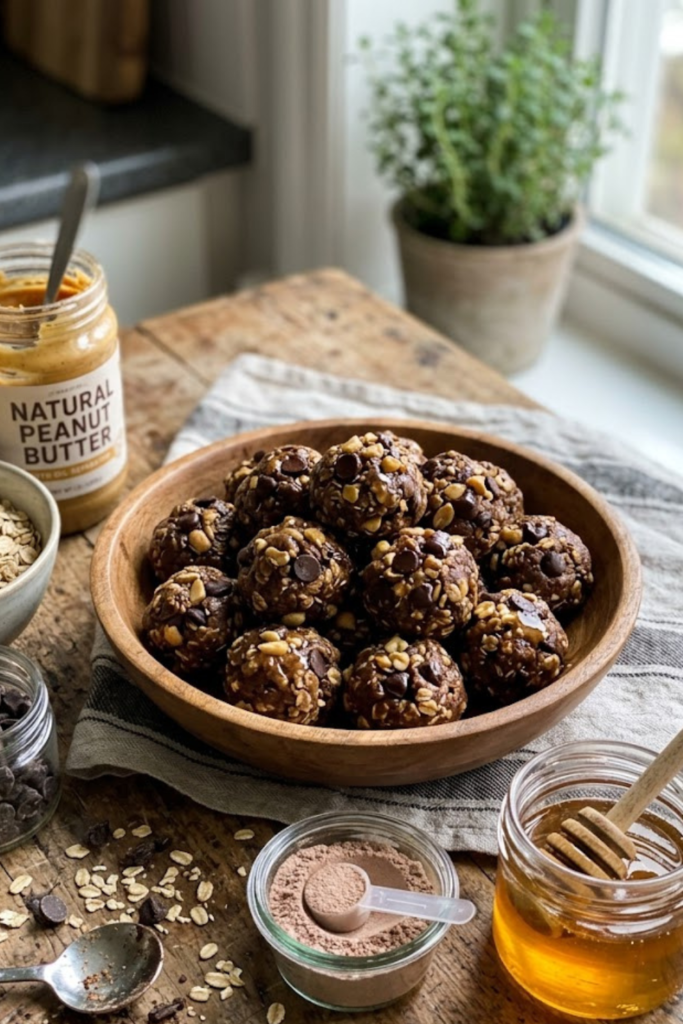
Why Chocolate Peanut Butter Protein Balls are the Perfect 2026 Snack
I’ve been teaching for a long time now, and I’ve seen food trends come and go. Remember when everyone was obsessed with those weird kale chips? Or those tiny packets of “magic” powder? Now that we are in 2026, things have changed a bit, but the need for a good, quick snack is still there. Actually, life feels faster than ever. Between the virtual classes and the busy work schedules most of us have now, sitting down for a full meal at lunch feels like a luxury. That’s why these chocolate peanut butter protein balls are my absolute go-to. They aren’t just a trend; they are a tool for staying focused.
Steady Energy for the 2026 Hustle
Most people grab a granola bar or a coffee when they hit that 3:00 PM wall. I used to do that too. But then I’d be hungry again thirty minutes later. The mix of fats from the peanut butter and the slow-burning carbs from the oats makes a huge difference. In 2026, we are all realizing that fast energy usually leads to a fast crash. These bites provide a steady stream of power to your body. It’s like putting the right fuel in a car. If you put cheap gas in, the engine knocks. If you eat junk, your brain knocks. I’ve found that eating two of these during my break keeps me sharp until dinner time. It helps me stay focused on my students without my stomach growling in the middle of a lesson. Man, I wish I knew about this years ago!
Saving Your Budget and Your Sanity
Have you seen the price of healthy snacks at the store lately? It’s getting ridiculous. A single high-protein bar can cost four or five dollars. If you have kids like I do, your wallet will be empty by Tuesday. By making these at home, you save a ton of money. You can buy the oats and peanut butter in bulk. I usually make a double batch on Sunday nights while I’m watching my favorite show. It takes maybe fifteen minutes. Plus, you don’t have to deal with those plastic wrappers that are everywhere now. It’s better for the planet and way better for your bank account. Dealing with high prices is a lot easier when you have a plan.
Simple Ingredients You Can Actually Trust
Another thing I love is knowing exactly what is inside. A lot of the pre-made stuff today is full of weird sugar alcohols that make your stomach feel funny. When you make these yourself, you control the sweetness. I use a tiny bit of honey or maple syrup. There’s no need for flavoring or stuff you can’t pronounce. It’s just real food that tastes like a treat. Honestly, they taste so good that you’ll forget they’re actually good for you. You get the chocolate fix without the guilt. Handling hunger shouldn’t be a struggle, and these make it easy. Just make sure you keep them in a cold spot so they don’t get too soft!

Essential Ingredients for Success
I’ve been teaching for two decades now, and if there is one thing I’ve learned, it’s that your supplies make or break the project. It doesn’t matter if it’s a science experiment in my classroom or a batch of chocolate peanut butter protein balls in my kitchen. When I first started making these, I thought I could just throw whatever was in the pantry into a bowl. Man, was I wrong! I once used this super dry, “fancy” peanut butter that had the texture of sand. My snacks ended up looking like actual dirt clods. My kids wouldn’t even touch them, and they usually eat everything in sight.
The Peanut Butter Factor
Let’s talk about the peanut butter first because it is the glue for the whole recipe. You really want the creamy kind for this. If you use that natural peanut butter that has a giant layer of oil on top, you have to stir it really well before you measure it out. If it is too runny, your chocolate peanut butter protein balls will just melt into a puddle on the tray. I usually look for a brand that just has peanuts and salt. If you like a little crunch, you can use chunky, but creamy makes them stick together much better. I’ve found that the store brand often works just as well as the expensive stuff.
Choosing Your Protein Powder
The protein powder is where most people get confused. I prefer a whey-casein blend because it acts like flour and soaks up the moisture. Pure whey can make things a bit rubbery if you aren’t careful. One time, I tried using a berry-flavored vegan protein because it was all I had left in the cabinet. Talk about a disaster! Chocolate, peanut butter, and fake strawberry do not mix well at all. Just stick to chocolate or vanilla. If you are vegan, pea protein works great, but you might need to add a little more liquid since it is very “thirsty” and absorbs everything.
Sweeteners and the Fun Stuff
For the oats, stick with old-fashioned rolled oats. Quick oats can turn into mush, and nobody wants a mushy snack. I also love adding a splash of honey or maple syrup to help things bind. It gives it that sweet kick that makes you feel like you are eating a real dessert. And of course, don’t forget the chocolate chips! I go for dark chocolate because it feels a bit healthier, but mini chips are the best. They spread out more so you get chocolate in every single bite. This part isn’t hard, you just have to pick stuff that tastes good on its own. If you follow these tips, your snacks will turn out great every time!

Step-by-Step Instructions for Perfect Texture
I’ve been in the classroom for over twenty years, and one thing I tell my students every single day is that the process is just as important as the answer. It’s the same way with cooking. If you just dump everything in a bowl and hope for the best, you’re probably going to have a bad time. Getting the right feel for these chocolate peanut butter protein balls is a bit of an art form. You want them to be firm enough to hold their shape but soft enough that you don’t feel like you’re chewing on a rubber eraser.
The “Goldilocks” Mix
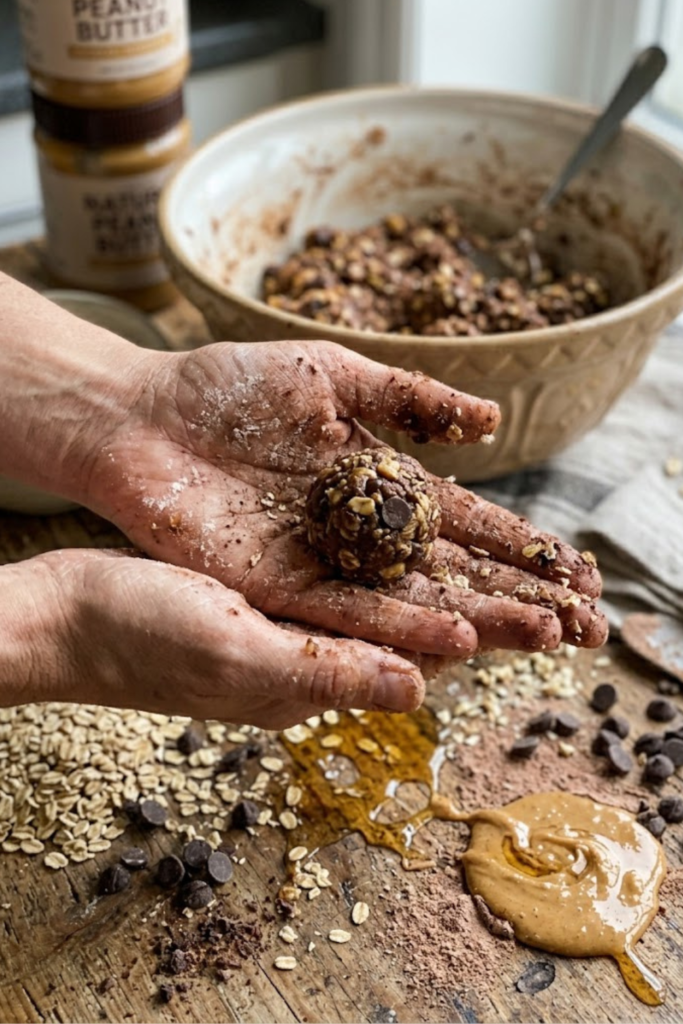
First, grab a big bowl. You need space to move things around. I always start by mixing the peanut butter and the honey together until they are totally smooth. If you throw the dry oats in first, you’ll be fighting clumps for twenty minutes, and nobody has time for that. Once the wet stuff is ready, slowly add your protein powder and your oats. It’s going to get really tough to stir at this point. I look at it as a great arm workout! If the dough feels too dry and crumbly, add a tiny teaspoon of water or almond milk. If it’s way too sticky, add a few more oats. You want it to feel like play-dough. I usually let my kids help with this part because they love getting their hands messy, though I have to watch them so they don’t eat all the chocolate chips before they actually go in the mix.
Why the Fridge is Your Best Friend
This is the part where most people mess up because they are in a huge hurry. I get it, you’re hungry and you want your snack now. But you really have to let the dough sit in the fridge for at least 30 minutes. Think of it like a “cool down” period after gym class. The oats need that time to soak up the moisture so the balls don’t fall apart later. If you try to roll them right away, you’ll just have a sticky mess all over your palms. Trust me, I’ve tried to skip this step when I was running late for a faculty meeting, and I ended up with chocolate smears all over my shirt. That wasn’t a great look for a professional!
Rolling for Success
After the dough has chilled, it’s finally time to roll. I use a small cookie scoop because it makes everything even. If you make some huge and some tiny, it’s hard to keep track of how many you’re actually eating. Just scoop the dough, roll it between your palms, and place them on a tray with parchment paper. If the dough sticks to your hands too much, put a little bit of coconut oil on your fingers. It works like a charm. Once they are all rolled, I keep mine in a container in the back of the fridge so the rest of the family doesn’t find them and eat them all in one night! Handling your snack prep this way makes the whole week much smoother.
Troubleshooting and Variations
I’ve been around the block a few times in my twenty years of teaching, and if there is one thing I tell my students, it’s that making mistakes is how you actually learn. My kitchen is basically a science lab where things go wrong all the time. Sometimes you follow a recipe for chocolate peanut butter protein balls and they just don’t look like the picture. Maybe they are falling apart, or maybe they are so hard you could use them as hockey pucks. Don’t worry about it! Most of the time, you can fix it without starting over.
Fixing Your Dough
One of the most common issues is the dough being too dry. This usually happens if your protein powder is extra “thirsty” or if you packed your measuring cup too tight with oats. If you try to roll a ball and it just crumbles into a pile of dust, don’t panic. Just add a teaspoon of water or milk at a time. Mix it in well before you add more. You want it to be just damp enough to stick. On the other hand, if it’s sticking to your fingers like glue and you can’t get it off, you need more dry stuff. Throw in a small handful of oats or a little more protein powder. It’s all about finding that middle ground where it feels like soft clay. I’ve had to fix my fair share of batches right before a school potluck!
Adding Your Own Spin
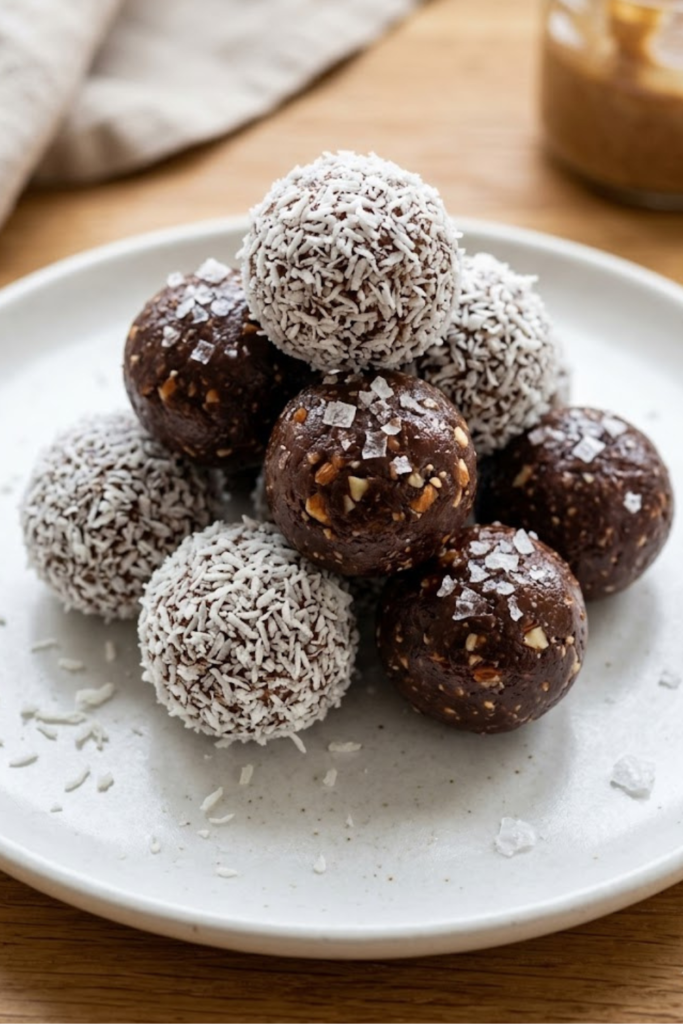
Once you get the base down, you can start having some real fun. I love a good classic recipe, but sometimes I want something a bit different. If I’m having a really long week at school, I like to add a teaspoon of instant espresso powder to the mix. It gives it a deep flavor and a tiny bit of a caffeine kick. Another favorite of mine is rolling the finished balls in shredded coconut or adding a pinch of sea salt on top. The salt really makes the chocolate flavor pop. You can even swap the dark chocolate chips for white chocolate or peanut butter chips if you want to go crazy. There are no rules here, so just use what you have in the cupboard.
School-Safe and Nut-Free Options
Being a teacher, I am always thinking about allergies. Many schools don’t allow peanuts at all anymore. If you want to send these with your kids or bring them to a classroom, you can totally swap the peanut butter for sunflower seed butter or soy nut butter. It tastes a little different, but it still works perfectly as a binder. You might need to add a tiny bit more sweetener since seed butters can be a bit more bitter than peanut butter. I’ve made these for my students before using almond butter too, and they disappeared in about five minutes. Just be sure to label them so everyone knows what is inside! Keeping things safe and tasty is the best way to handle snack time.
Final Thoughts on Your Snack Prep Journey
I’ve been standing at the front of a classroom for twenty years now, and if I’ve learned anything, it’s that you have to be ready for anything. Some days are just long, and you need a bit of a boost to get through that last period when the kids are getting restless. These chocolate peanut butter protein balls have honestly changed the way I handle my work days. Instead of feeling tired and grumpy by 3 PM, I feel like I actually have enough gas in the tank to finish grading papers or help a student after school. It’s funny how a little snack can make such a big difference in how you feel as you go through your day.
Keeping Them Fresh for the Week
Once you have finished rolling all your snacks, you need a good place to keep them so they stay yummy. I usually put mine in a big glass container with a lid. I like the glass ones because you can see exactly how many are left, and they don’t get that plastic smell. They stay good for about a week in the refrigerator, though they never actually last that long at my house! If you want to make a huge batch, you can put some in the freezer. They freeze really well. I sometimes just grab a couple of frozen ones on my way out the door in the morning. By the time my lunch break rolls around, they are perfectly thawed and ready to eat. It makes my mornings a lot less stressful.
Your Health is an Investment
We talk a lot about the future in my classes, and I tell my kids that taking care of yourself is the best thing you can do for your future self. In 2026, it’s easy to get distracted by expensive gym memberships or fancy gear, but real health starts in your kitchen. Making these snacks is a small way to show yourself some love. You are giving your body good ingredients like protein and oats instead of processed junk from a vending machine. It feels good to know you are doing something right for your energy levels. Plus, they just taste great! There’s no reason healthy food has to be boring.
Share the Love on Pinterest
I really hope you give this recipe a try this week. It’s simple, it’s fast, and it’s something you’ll actually look forward to eating when things get busy. If you liked this post, please pin it to your favorite Pinterest board! Sharing it helps other people find easy ways to eat better, and I really appreciate the support. It’s like when a student tells me they actually enjoyed a lesson—it makes all the work worth it. Let me know in the comments if you tried any of those fun variations we talked about earlier. I’d love to hear how your batch turned out! Happy snacking, and I will see you in the next post!