“You can’t go wrong with chicken,” my grandmother used to say, and boy, was she right! Did you know that in 2026, over 70% of home cooks still rank chicken as their top “panic dinner” choice? I’ve been there—standing in front of the fridge at 5:30 PM, staring at a pack of meat like it’s a math problem.
This baked parmesan crusted chicken breast is my absolute “get out of jail free” card. It’s crunchy, salty, and way better than those frozen nuggets we all secretely love. Let’s get cooking because your taste buds are about to throw a party!
The Secret to That Golden Panko Crunch
I used to think that making baked parmesan crusted chicken breast was as simple as just dumping some crumbs on meat and tossing it in the oven. Boy, was I wrong. My first few tries were pretty sad. The chicken tasted okay, I guess, but the outside was pale and kind of soggy. It didn’t have that “crunch” you get at a restaurant. I realized that the oven just doesn’t have enough time to brown the breadcrumbs before the chicken gets overcooked and dry. That is a real problem because nobody wants to eat a dry piece of meat just to get a little bit of texture on the outside. After a lot of trial and error in my kitchen, I found the one trick that changed everything for my dinners.
Why You Should Toast Your Crumbs First
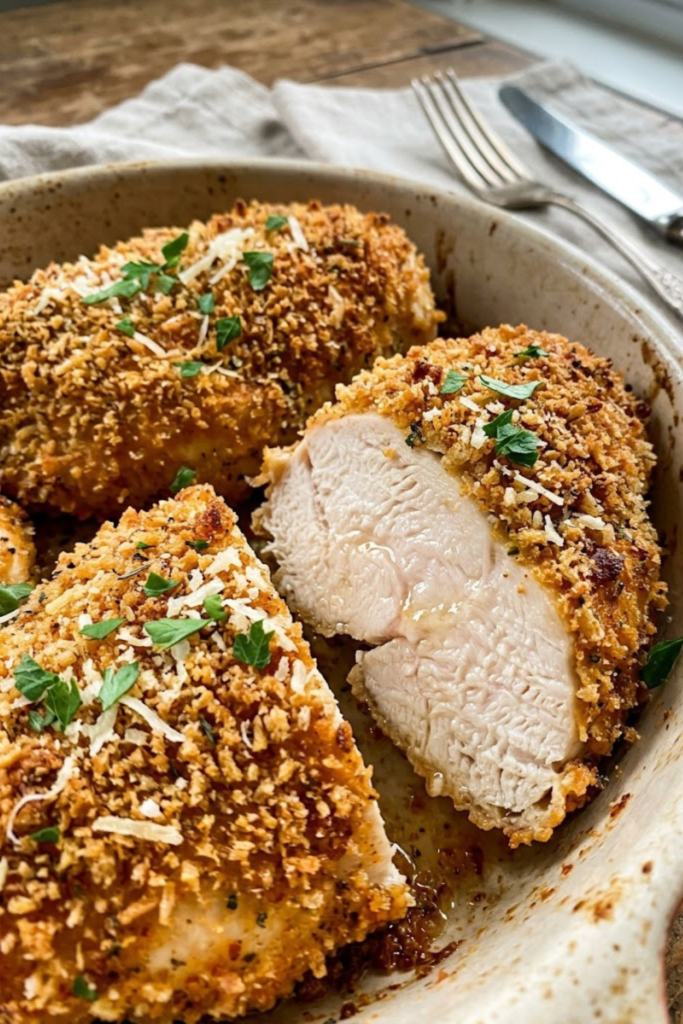
The real secret is toasting your panko breadcrumbs in a pan before they ever touch the chicken. I grab a big skillet and put it on medium heat. Don’t add oil or butter yet! Just put the dry crumbs in there. You have to stay right there and stir them constantly. If you walk away to check your phone or yell at the kids, they will burn in a heartbeat. Trust me, I’ve smelled that burnt smell more times than I want to admit. You are looking for a nice, light golden-brown color. It usually takes about three or four minutes. Once they look like a toasted marshmallow, take them off the heat immediately. This step makes sure that your baked parmesan crusted chicken breast actually stays crispy even after it sits on the plate for a few minutes.
Choosing the Right Parmesan Cheese
Now, let’s talk about the cheese. I used to buy the big, long shreds of parmesan because I thought they looked fancy. But those big shreds don’t stick very well. They just fall off into the bottom of the pan, and then you’re left with naked chicken. I started using the very finely grated parmesan instead. It’s almost like a powder. When you mix that fine cheese with your toasted panko, it fills in all the little gaps. Every single bite gets that salty, cheesy flavor. It’s way better than having one big clump of cheese in one spot and nothing everywhere else. It really helps create a solid “crust” that holds together.
Mixing in the Flavor for Success
While the crumbs are still warm from the pan, that is when I toss in the seasonings. I use a good amount of garlic powder and a little bit of onion powder. If you want a tiny bit of color, a sprinkle of smoked paprika is great too. I don’t use fresh garlic here because it can burn in the oven and taste bitter. The powder works much better for this specific recipe. I just mix it all together in a shallow bowl so it’s ready for the chicken. This little bit of prep work makes a huge difference in how the final meal turns out. It feels like a lot of steps, but it really only adds five minutes to the whole process. Honestly, the smile on my family’s face when they hear that “crunch” is totally worth the extra dish to wash.
Keeping It Juicy: The Mayonnaise Hack
Nobody wants to eat chicken that feels like you’re chewing on a piece of dry string. I’ve made that mistake more times than I’d like to admit in my own kitchen. I remember one Tuesday night I served my family chicken that was so dry, we all had to drink a full glass of water just to get one bite down. It was embarrassing! Usually, people use a standard egg wash to get their breading to stick, but I found that eggs can be a bit thin. Sometimes the coating just slides right off in the oven, leaving you with a naked piece of meat and a pile of crumbs on the pan. That is why I started using the mayonnaise hack. It might sound a bit weird at first, but it is the best way to keep that meat tender and make sure every bit of that parmesan crust stays exactly where it belongs.
Why Mayo Works Better Than Eggs
The science behind this is pretty simple, even if you aren’t a chemistry teacher. Mayonnaise is basically just oil and egg yolks mixed together until they are thick. Because it has all that extra fat, it acts like a protective blanket for the chicken breast. While the high heat of the oven is cooking the outside, the mayo is keeping the inside from losing all its moisture. Plus, it is thick enough to hold onto a lot of breadcrumbs. With a regular egg wash, you get a thin layer of crunch. With mayo, you get a thick, satisfying crust that doesn’t budge. I tried using Greek yogurt once because a magazine said it was a healthy swap, but it was way too tangy and didn’t give that same rich flavor. The mayo just melts into the meat, so you don’t even really taste it in the end. You just taste juicy chicken.
How to Apply the Coating Correctly
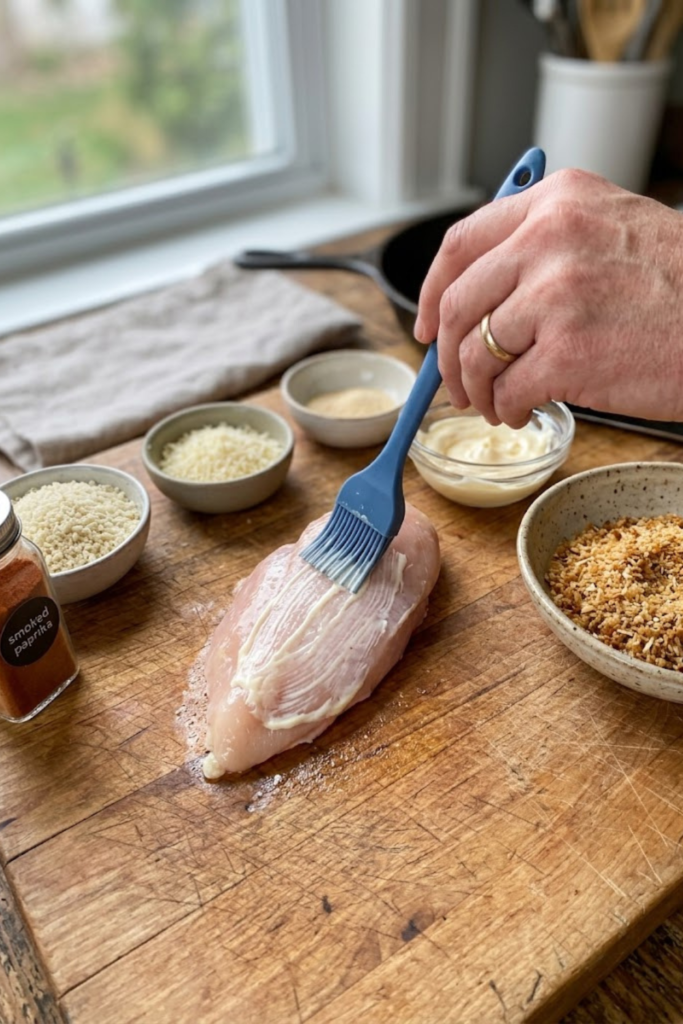
You don’t want to just glob it on there like you’re making a sandwich. The goal is a thin, even layer. I always start by taking a paper towel and patting the chicken breasts completely dry. If the meat is wet, the mayo will just slide around. Once they are dry, I use a small brush or even just the back of a spoon to spread a little bit of mayo over the whole thing. Make sure you get the sides too! You want every inch covered so the parmesan can stick everywhere. I usually do one piece at a time. I coat it in mayo, then immediately press it into my bowl of toasted panko and cheese. You really have to press down hard to get those crumbs to lock in. It’s a little messy, but that’s part of the fun of cooking.
A Quick Tip for Extra Flavor
If you want to get really fancy, you can mix a little bit of Dijon mustard into your mayo before you spread it. It adds a tiny bit of zing that really cuts through the saltiness of the parmesan cheese. I started doing this a few years ago and now my kids won’t let me make it any other way. It gives the chicken a professional taste without you having to do any real extra work. Just remember to keep your layers thin so the breading doesn’t get heavy. This method is the real deal for anyone who is tired of dry, boring chicken dinners. It makes a big difference.
Oven Temps and The Magic Wire Rack
Let’s talk about heat for a minute. I used to be one of those cooks who baked everything at 350 degrees because it felt safe. I was always worried about burning the house down or making the chicken look like a piece of coal if I went any higher. But when you are making baked parmesan crusted chicken breast, 350 degrees is actually your enemy. It is just too slow. At that low temperature, the breading gets warm but it never gets that deep, dark brown color we all want. While you are waiting for it to brown, all the juice is leaking out of the meat and into the pan. It’s a lose-lose situation that ends with a dry dinner.
Why High Heat is Your Best Friend
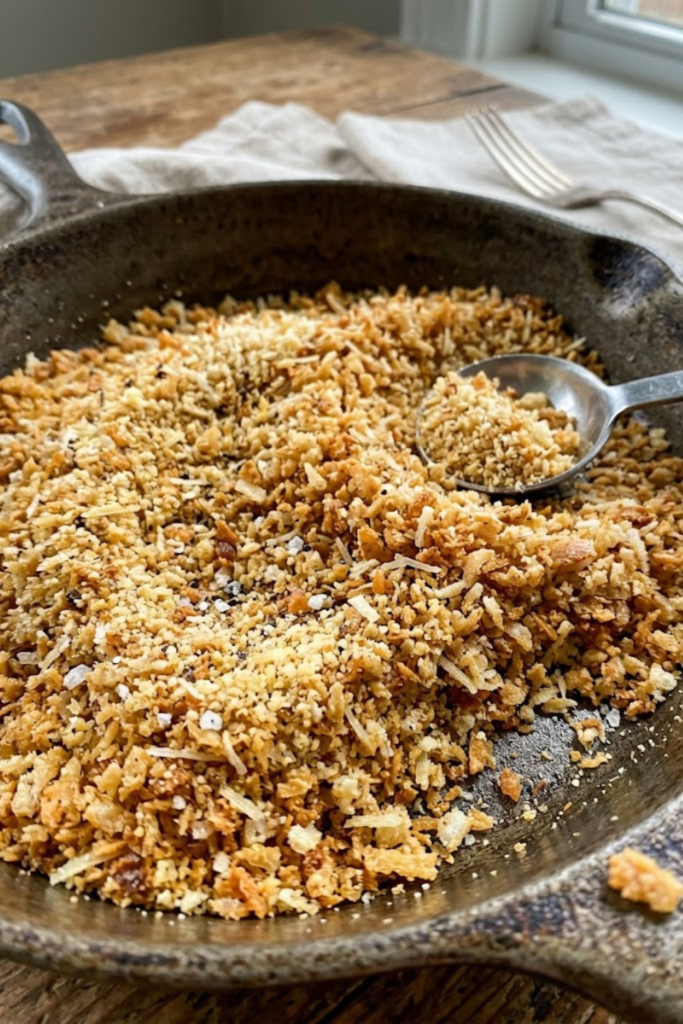
I finally got brave one afternoon and cranked my oven up to 425 degrees. My husband thought I was going to ruin everything, but it worked perfectly! At that high temperature, the parmesan cheese starts to melt and sizzle, and those toasted breadcrumbs get even crispier almost instantly. Since the heat is so intense, the chicken cooks through much faster, which actually helps it stay juicy on the inside. I usually aim for about 15 to 20 minutes depending on how thick the meat is. You want to see that crust bubbling a little bit. It looks so much more professional when it comes out looking like it was deep-fried even though it was just sitting in your oven.
The Wire Rack Trick for Crunchy Bottoms
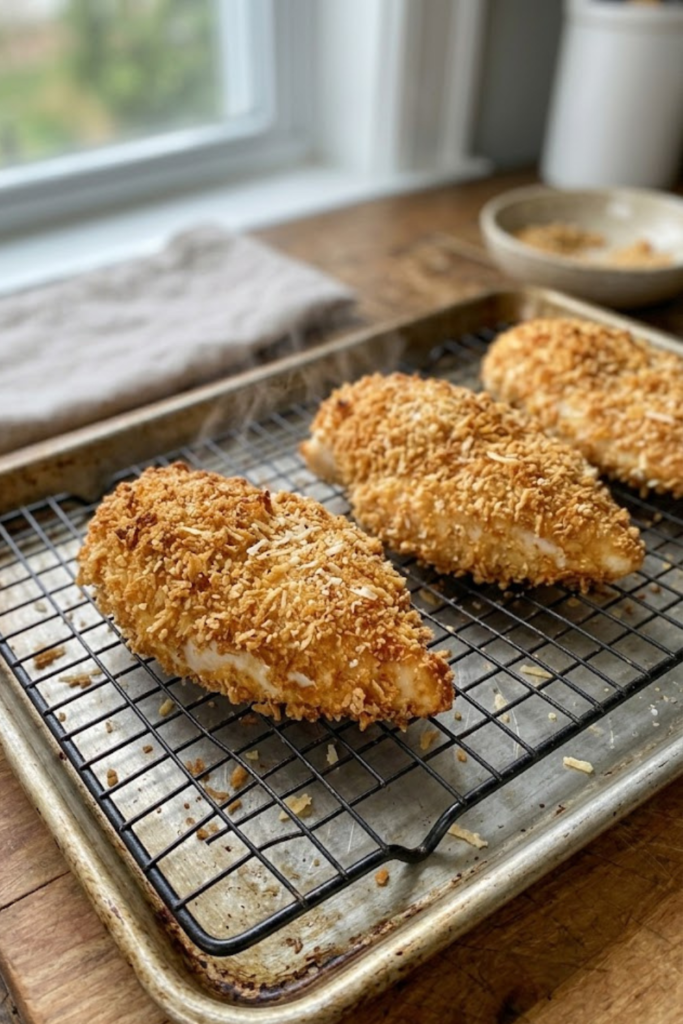
The biggest problem I had for years was the bottom of the chicken. The top would look perfect, but the part touching the metal pan would be a soggy, wet mess. It was so gross to flip it over and see that! Then I found a dusty old wire rack in the back of my kitchen cabinet. I started putting that rack right on top of my baking sheet and placing the chicken on the rack instead of the pan. This lets the hot air move all the way around the meat, even underneath it. It is like a little magic trick for your kitchen. Every single side stays crunchy. If you don’t have a rack, you can use some crumpled up tin foil to lift the meat up a bit, but a rack is much easier.
Checking the Internal Temp
I always tell my friends that you can’t just guess when chicken is done by looking at it. You really should use a meat thermometer. For a perfect baked parmesan crusted chicken breast, you want the middle to hit 165 degrees. I actually pull mine out when the little screen says 160 degrees. While it sits on the counter for five minutes, the heat keeps moving and it reaches 165 on its own. If you wait until it says 165 while it’s still in the oven, it might end up a bit overdone by the time you actually sit down to eat. Just let it rest and it’ll be the best chicken you ever had.
Making This Your New Favorite Meal
Well, we finally made it to the end of our cooking journey. I hope you feel ready to go into your kitchen and make the best dinner ever. Making baked parmesan crusted chicken breast isn’t just about following a list of steps; it is about finding a way to make your life a little easier while still eating something that tastes like a million bucks. I’ve spent so many years trying to find a dish that my kids wouldn’t complain about, and this is the one that saved my sanity on those long Wednesday nights. It feels good to put a plate down and know that everyone is going to actually eat it. No more fighting at the table over “just one more bite.”
Why This Recipe Sticks Around
The reason I love this baked parmesan crusted chicken breast so much is because it is so reliable. You don’t need any fancy tools or ingredients that you can’t find at the local grocery store. It’s just simple, honest food. Whether you are a teacher like me or you work a busy job in an office, you need recipes that work every single time without causing a headache. This one hits all the marks: it is crunchy, it is salty, and it is super filling. Plus, it makes the whole house smell like a high-end Italian restaurant while it’s in the oven. My neighbors even asked me what I was making the last time I had the windows open!
What to Serve on the Side
If you are wondering what to put on the plate with your chicken, I usually keep it pretty simple. Since the chicken has that heavy, delicious crust, I like to serve it with something light. A big green salad with a little bit of lemon juice is perfect. Or, if my kids are really hungry, I’ll make some buttery mashed potatoes. The juice from the chicken mixes with the potatoes and it is just heaven. Sometimes I even slice up the leftovers and put them on top of some pasta with a little bit of jarred marinara sauce. It’s like a quick version of chicken parmesan but without all the heavy frying and extra oil.
Storing and Reheating Leftovers
If you happen to have any chicken left over, don’t throw it away! It stays good in the fridge for about three days. The trick to reheating it so it stays crispy is to put it back in the oven or an air fryer for a few minutes. Don’t use the microwave unless you want it to get soft. I actually like it cold on a sandwich the next day with a little bit of extra mayo and some lettuce. It is a great lunch for work. If you enjoyed this recipe and it helped you out, please save it and share it on Pinterest! It helps other busy families find easy meals that actually taste good. Happy cooking!