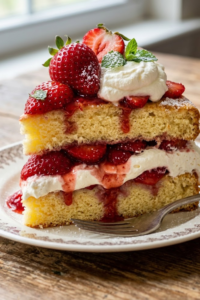
Did you know that peanut and tree nut allergies have more than tripled in children since the late 1990s? That statistic hit home for me when my daughter’s school went completely nut-free this year. I stood in the pantry staring at a box of peanut butter bars, realizing I had nothing to pack in her lunchbox! It was a total panic moment. But honestly, finding a good nut free granola bars recipe that doesn’t taste like cardboard is harder than it looks.
In this post, I’m sharing my absolute favorite homemade granola bars that are completely safe for school, incredibly chewy, and so easy to make! You won’t even miss the nuts. Whether you are dealing with allergies or just following classroom rules, these bars are a lifesaver. Let’s get baking!
 1")
Why You Need This Nut-Free Snack in Your Rotation
Honestly, I used to be that parent who rolled their eyes at the strict “no nuts” policy letters sent home in September. I mean, peanut butter was practically a food group in my house growing up! But then, reality hit me hard a few years ago. I was rushing to pack lunchboxes, tossed in a standard granola bar, and got a frantic call from the school nurse later that day. It wasn’t even a peanut bar, but it was “processed in a facility” with nuts. Talk about a mom-guilt moment. I felt terrible.
That’s when I realized I needed to get my act together regarding nut free snacks. It’s not just about following rules; it’s about keeping all our kids safe. And let’s be real, finding store-bought options that don’t taste like sawdust is a challenge.
The “Safe Snacks for School” Struggle is Real
If you’ve ever stood in the grocery aisle reading the back of every box, you know the pain. “May contain traces of almonds.” “Made on shared equipment.” It’s exhausting! When you make homemade granola bars, you control the environment. You know exactly what’s going into the mixing bowl.
I’ve learned the hard way that cross-contamination is a sneaky beast. By making these at home, I can scrub down my counters and use dedicated utensils. It gives me peace of mind that a box of factory-made snacks just can’t. Plus, you become the hero of the soccer team when you show up with allergy friendly snacks that everyone can actually eat.
Saving My Wallet, One Bar at a Time
Let’s talk cash for a second. Have you seen the prices of those specialized “school safe” bars? It’s highway robbery! I calculated it once because I’m a bit of a nerd about budgeting.
- Store-bought allergy-safe bars: Approx. $1.00 – $1.50 per bar.
- My homemade oat bars: Approx. $0.35 per bar.
That adds up fast when you have two kids needing snacks every single day. I was spending nearly $40 a month just on snack bars! Switching to buying bulk oats and a jar of sunflower seed butter was a total game changer for our grocery bill. My wallet is definitely happier, and frankly, the lunchbox ideas for kids I come up with now are way tastier.
Texture Control: Chewy vs. Rock Hard
Here is my biggest beef with store-bought bars: the texture. They are either so hard they threaten to chip a tooth, or they fall apart the second you open the wrapper. It’s frustrating.
When you make them yourself, you get to decide. I personally love a super chewy bar, so I add a little extra honey. If you like them crunchy, you can bake them longer. It’s all up to you. I remember the first time I nailed the texture—it was a total triumph. I did a little happy dance in the kitchen.
And hey, mistakes happen. My first batch was a crumbly mess because I didn’t press them down hard enough. We just ate it as granola over yogurt. No biggie. But once you get the hang of it, these peanut free granola bars will be the only thing your kids ask for.
 2")
Essential Ingredients for Allergy-Friendly Granola Bars
Okay, let’s raid the pantry. When I first started trying to make a nut free granola bars recipe, I thought I could just swap peanut butter for regular butter and call it a day. Spoiler alert: I ended up with a pan of greasy granola that fell apart if you looked at it wrong. It was a tragedy.
Through a lot of trial and error (and a lot of crumbled messes eaten over the sink), I’ve figured out the exact team of ingredients you need to make these bars hold their shape and taste amazing. You don’t need fancy stuff, but you do need the right stuff.
Rolled Oats: The Backbone
Listen to me closely here: put the quick oats down. I tried using quick oats once because it was all I had on hand, and the texture was just… weird. It was mushy and dense, not chewy and hearty.
You want Old-Fashioned Rolled Oats. They provide that classic structure we all love in homemade granola bars. They’re big, flat, and absorbent enough to soak up the binder without turning into oatmeal sludge. Plus, they are naturally gluten-free, but if you have a serious allergy like Celiac disease, please double-check that the package specifically says “Certified Gluten-Free.” Oats are often processed in the same facilities as wheat, and we aren’t taking any risks here!
The Binder: Seed Butters
Since we are ditching the peanut butter to keep these school safe, we need a thick, creamy alternative. My absolute favorite is sunflower seed butter. It has a flavor that is surprisingly similar to peanut butter but slightly earthier.
Here is a funny science lesson I learned the hard way: if you use sunflower seed butter and baking soda (which we aren’t using today, thankfully), your bars can turn green! It’s a chemical reaction with the chlorophyll. It’s totally safe to eat, but try explaining to a 6-year-old why their snack is Hulk-colored.
If you aren’t a fan of sunflower seeds, pumpkin seed butter is another great option. Just make sure it’s creamy. If it’s too oily or runny, your bars might not set properly. I usually give the jar a serious stir before measuring.
The “Glue”: Sticky Sweeteners
You cannot use granulated sugar here. Well, you can, but they won’t be bars; they’ll be loose granola. To get that perfect, bendy chew, you need a liquid sweetener.
- Honey: This is my go-to. It’s thick, sticky, and tastes like comfort.
- Brown Rice Syrup: If you want them to be vegan or less sweet, this stuff is magic. It’s incredibly sticky—like, “glue your mouth shut” sticky—which makes it the ultimate binder for nut free snacks.
I’ve had moments of frustration where I tried to cut sugar by using maple syrup alone. Maple syrup is delicious, but it’s thinner. The bars didn’t hold together as well. If you use maple syrup, you might need to boil it down a bit or accept a softer bar.
The Fun Stuff: Mix-ins
This is where you can let the kids help! My daughter is obsessed with chocolate, so we use mini chocolate chips. But here is the catch: you have to read the label. A lot of chocolate is processed on lines that handle almonds or peanuts.
I always look for brands that are top-8 allergen-free. It’s a small detail, but it matters. If you want to keep it healthier, dried fruit like cranberries, raisins, or chopped apricots work beautifully. Just chop them small so they don’t break the bar when you cut it.
Adding seeds like chia or hemp hearts is an awesome way to sneak in some omega-3s without changing the taste. I toss them in, and the kids don’t even notice. It’s a mom win!
 3")
Step-by-Step: How to Make Nut Free Granola Bars
Alright, roll up your sleeves because we are about to make some magic happen in the kitchen. The first time I tried to wing a nut free granola bars recipe, I ended up with a sticky countertop and a lot of frustration. I didn’t follow a process, and boy, did it show.
But don’t worry, I’ve made all the mistakes so you don’t have to. These easy snack recipes are actually pretty forgiving once you know the tricks.
Step 1: Toasting is Not Optional
I used to skip this step because I’m impatient. I figured, “Eh, raw oats are fine.” Wrong. They taste like cardboard.
Preheat your oven to 350°F (175°C). Spread your oats and seeds on a baking sheet and pop them in for about 10 minutes. You want them to smell nutty and look slightly golden.
Keep an eye on them though! I once got distracted by a load of laundry and came back to burnt oats. There is no saving burnt oats; you just have to toss them. Toasting brings out a depth of flavor that makes these homemade snack bars taste professional.
Step 2: Melding the Sticky Stuff
While the oats are cooling, grab a small saucepan. You’re going to combine your sweetener (honey or syrup), your seed butter, and a splash of vanilla.
Heat it over low-medium heat. You don’t want it to boil vigorously! If you cook the sugar mixture too long, it turns into hard candy. I learned this the hard way when my son nearly chipped a tooth on a rock-hard bar.
You just want it warm enough to be runny and fully combined. It should look glossy and smooth.
Step 3: The Great Mix and Press
Pour that liquid gold over your dry ingredients in a big bowl. Mix it fast! As the sugar cools, it gets harder to stir. It’s gonna be an arm workout, but you got this.
Once it’s mixed, dump it into an 8×8 inch pan lined with parchment paper. Leave some paper hanging over the sides—this is a lifesaver when you need to lift them out later.
Now, here is the secret to seed and oat bars that don’t crumble: Pressure.
If you just pat them down, they will fall apart. I take a flat-bottomed measuring cup or a glass and press down hard. You need to pack that mixture into the corners like your life depends on it. Really compact it.
Step 4: The Hardest Part (Waiting)
This is where I usually fail. You have to let them cool completely. I know, it smells amazing and you want to eat one right now. But if you cut them while they are warm, they will disintegrate into loose granola.
I usually stick the pan in the fridge for about 2 hours to help them set. It guarantees a solid cut. Once they are cold, lift the parchment paper out, put the block on a cutting board, and slice them up with a sharp knife.
Boom. You just made the best snack of the week.
 4")
Tips for Storing and Freezing Homemade Granola Bars
I am going to be real with you for a second. There is nothing worse than making a beautiful batch of homemade granola bars, only to find them stale or covered in weird freezer burn three days later. I’ve done it. I once threw an entire batch in a ziplock bag without wrapping them, and they turned into one giant, inseparable mega-bar. It was delicious, sure, but not exactly portable.
Figuring out the best way to store these little guys is key if you want them to survive the week. Since we aren’t using all those weird preservatives that store-bought brands use, these have a shorter shelf life. But honestly? They usually get eaten so fast it doesn’t matter.
Counter or Fridge? That is the Question
So, where do you put them? It depends on your kitchen climate. In the winter, I can leave them on the counter in an airtight container for about 5 to 7 days. They stay soft and chewy.
However, if it’s summer or your house runs warm, the fridge is the way to go. I learned this when I left a container out during a heatwave. I came back to a sticky, melty chocolate mess. It was tasty, but messy.
If you use chocolate chips or coconut oil, they will melt if it gets too hot. Keeping them in the fridge keeps them firm. Just let them sit out for a few minutes before eating if you don’t want them too cold. It’s a delicate balance.
The Freezer is Your Best Friend
I am obsessed with meal prep snacks. Sunday is my baking day, and I like to make a double batch to stock the freezer. It makes mornings so much smoother.
Here is my trick for freezing:
- Cut the bars into squares.
- Wrap each one individually in a small piece of parchment paper or wax paper.
- Toss them all into a large freezer bag.
By wrapping them individually, you can grab just one at a time without having to chip it off a frozen block. They last up to 3 months in the freezer! It’s perfect for those chaotic mornings when you realize you forgot to buy groceries. These are the ultimate grab and go snacks.
Lunchbox Logistics
Packing these for school requires a little strategy. Since these nut free granola bars recipe are held together by honey and seed butter, they can get a little soft if they sit in a warm backpack all day.
I usually pack them right next to the ice pack in my kid’s lunchbox. It keeps them solid until snack time. I also leave them in the parchment wrapper or put them in a small reusable container so they don’t get squished by an apple or water bottle.
I once sent my son to school with a bar just tossed in a paper bag. He came home and told me he had to eat it with a spoon. Oops. Lesson learned!
If you treat these bars right, they will be a lifesaver for your school safe recipes rotation. Just don’t hide them too well in the back of the fridge, or you might find them six months later looking sad. Not that I’ve done that… okay, maybe once.
 5")
Common Substitutions and Variations
One of the things I love most about baking is that it’s kind of like jazz—you can improvise a little bit once you know the basic rhythm. I used to be terrified of deviating from a recipe. I thought if I changed one thing, the whole kitchen would explode. Spoiler: it didn’t.
Over the years, I’ve had to tweak this nut free granola bars recipe for all sorts of dietary needs. Whether it was for a playdate with a gluten-intolerant friend or just because I ran out of honey, I’ve tried it all. Some experiments were disasters, but most were pretty tasty surprises.
Going the Gluten-Free Route
If you are dealing with Celiac disease or a serious intolerance, you have to be careful with oats. I learned this when I made a batch of gluten free nut free snacks for a neighbor. I used regular oats, thinking, “Oats are a grain, they’re fine, right?”
Wrong. Regular oats are often processed on the same equipment as wheat. You absolutely need to buy certified gluten free oats. It’s a specific label. Don’t just guess! It’s better to be safe than sorry when it comes to tummies. The texture remains exactly the same, so no one will even know the difference.
Vegan and Dairy-Free Adjustments
We are technically already making dairy free granola bars since there is no butter or milk involved, which is awesome. But if you want to make these fully vegan, you have to ditch the honey.
I know some vegans eat honey, but many don’t. I’ve swapped honey for maple syrup plenty of times for vegan granola bars. Here is the catch though: maple syrup is thinner. It’s more watery.
If you just swap it 1:1, your bars might be a little softer. I usually boil the maple syrup for just a minute or two to thicken it up before mixing. Or, you can use agave nectar or brown rice syrup, which are naturally stickier.
Boost the Nutrition with Seeds
Sometimes I feel like a sneaky mom ninja when I make these. I love hiding extra nutrition in there. My kids are super picky about textures, but I’ve found that hemp heart recipes are great because hemp seeds are so soft they basically disappear.
You can also throw in chia seeds or flax meal. Chia seed granola bars have a nice little crunch, and flax adds fiber. Just don’t go overboard! If you add too many dry seeds without adding a little more liquid binder, your bars will be dry. It’s a balancing act.
Flavor Twists to Keep it Fresh
Don’t get bored with just plain vanilla! I love adding a pinch of sea salt on top to make that sweet-salty combo pop. It makes them taste like a gourmet treat you paid $5 for at a coffee shop.
You can also add cinnamon for a warmer flavor, or even a little dried ginger if you’re feeling fancy. I once tried adding dried cherries and dark chocolate chunks, and it tasted like a Black Forest cake.
Basically, use this base recipe as your canvas. As long as you keep the ratio of dry to wet ingredients roughly the same, you can’t really mess it up. Have fun with it!
 6")
There you have it! Making your own nut free granola bars recipe is honestly one of the best habits you can get into for the school year. I used to think I didn’t have time for this kind of stuff, but once you get into the rhythm, it’s so fast.
Not only are you saving a ton of money compared to those pricey “safe” brands, but you also get total peace of mind. You know exactly what ingredients are going into your child’s body. No hidden allergens, no weird chemicals, just wholesome goodness! Plus, the look on my daughter’s face when she opens her lunchbox to see a homemade treat? Totally worth the sticky fingers.
I hope you love these chewy, sweet, and safe treats as much as we do. If you try them, let me know which mix-ins you used! I’m always looking for new flavor combos to try out on the family.
Don’t forget to save this recipe! Pin this image to your School Snacks or Allergy-Friendly Recipes board on Pinterest so you can find it later!