Did you know that nearly 70% of home cooks complain that their chicken turns out like a dry piece of cardboard? I used to be right there with you, staring at a sad, gray piece of meat and wondering where I went wrong. But everything changed once I figured out this air fryer chicken breast with crispy edges and juicy center recipe. It’s honestly a game-changer for my Tuesday night dinners!
You want that crunch when you bite in, but you also want the juices to run down your chin, right? It sounds like a dream, but in 2026, it’s just science and a bit of kitchen magic. I’ve spent months tweaking the temperature and the spice rub to get this just right for my family. Get ready to throw away those old, boring recipes because this is the only one you’ll ever need.
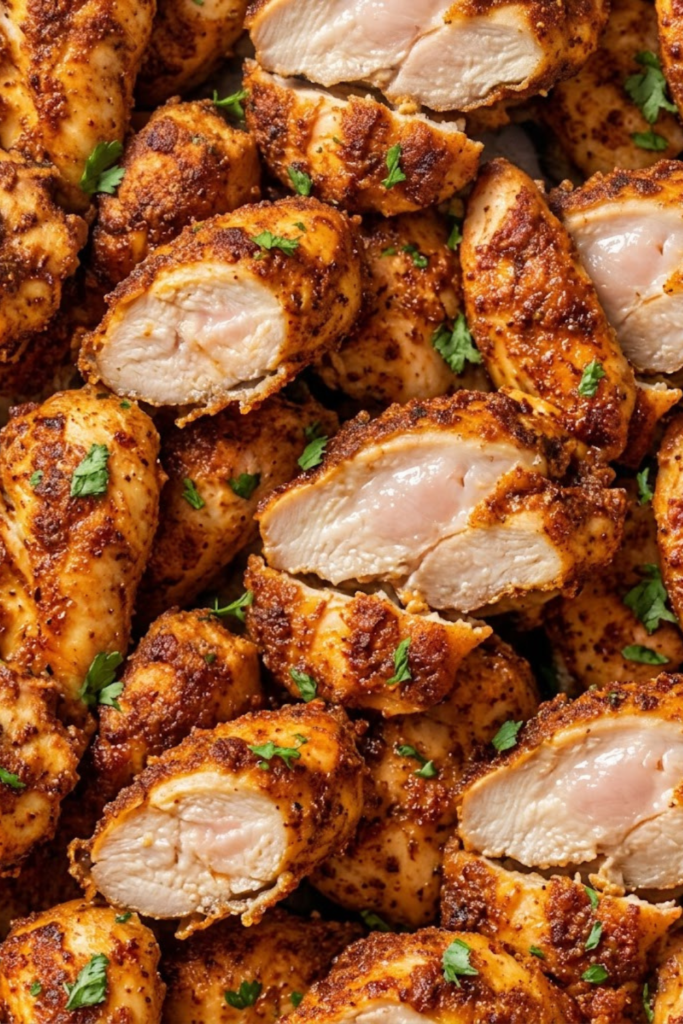
Selecting the Right Meat and Prepping for Success
I have spent many nights looking at a piece of chicken that looked more like a dry rubber boot than a meal. It is really frustrating when you want a good dinner but end up with something that is hard to swallow. To get a great air fryer chicken breast with crispy edges and juicy center recipe, you have to start your work before you even turn the machine on. I learned this the hard way after ruining way too many Sunday lunches for my family. If you just grab any old package of meat and toss it in the basket, you are going to be sad with the results.
Pick the Right Package at the Store
When you are at the grocery store, do not just grab the biggest tray you see. Those giant, woody chicken breasts often have a weird texture that no amount of cooking can fix. I like to look for medium-sized pieces that have a nice pink color. Avoid anything that looks gray or has a lot of liquid sitting in the bottom of the tray. If the meat looks like it has white stripes running through it, put it back. That usually means the meat will be tough. I usually try to buy air-chilled chicken if I can find it. It costs a little more, but it doesn’t have extra water pumped into it, which helps us get those crispy edges we want.
Level Out the Thickness
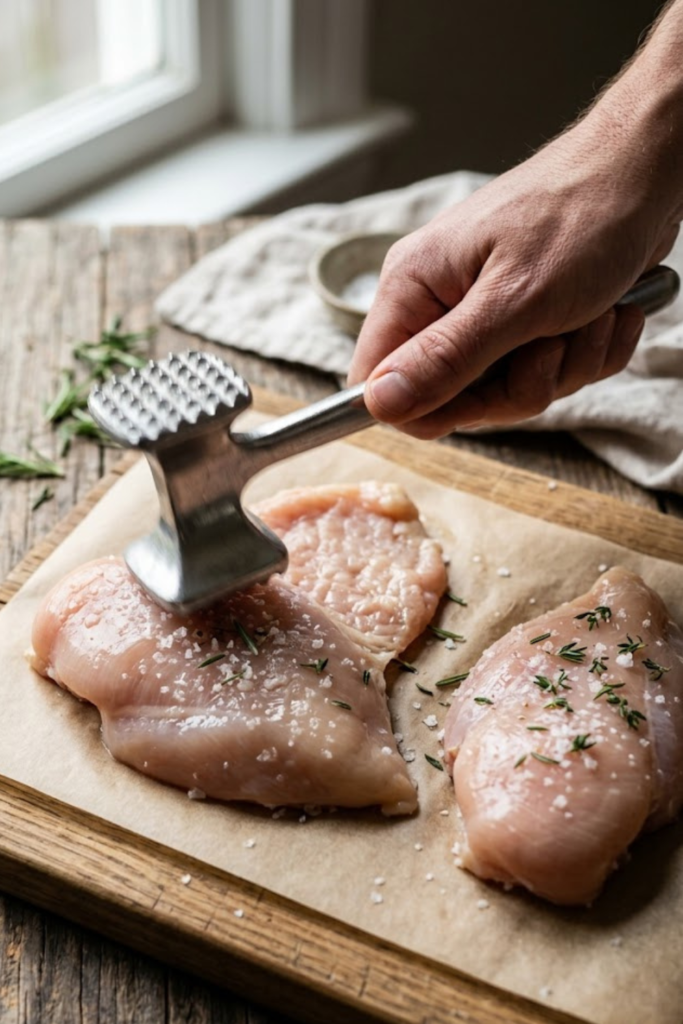
One big mistake I used to make was trying to cook a chicken breast that was thick on one end and thin on the other. The thin part would turn into jerky while the thick part was still raw. Now, I always use a heavy rolling pin or a meat mallet. Put your chicken between two pieces of plastic wrap and give it some good whacks. You want the whole piece to be about an inch thick all the way across. This step makes sure everything cooks at the same speed. It is also a pretty good way to get out some stress after a long day at work!
The Secret of Dry Skin
You might think washing your chicken or keeping it wet is good, but moisture is the enemy of a crunch. If the meat is wet when it hits the heat, it will steam instead of fry. I take a big pile of paper towels and pat every single piece until it is bone dry. After that, I sprinkle a little salt on them and let them sit on a rack in the fridge for about twenty minutes. This helps draw out even more moisture from the surface. Doing this is the main way I get that golden crust without overcooking the middle. Trust me, skipping the paper towels is the fastest way to end up with soggy, sad chicken.
The Secret Seasoning Rub for Maximum Crunch
For a long time, I thought that putting a bit of salt and pepper on my chicken was enough to make it taste good. I was very wrong. My kids used to call my cooking “gray meat” because it had no color and even less flavor. It was pretty embarrassing to be honest. If you want a real air fryer chicken breast with crispy edges and juicy center recipe, you have to treat the seasoning like it is the most important part of the job. It took me dozens of tries to find the right mix that gives that deep golden color and a crunch that you can actually hear when you bite down.
Why the Oil You Use Matters
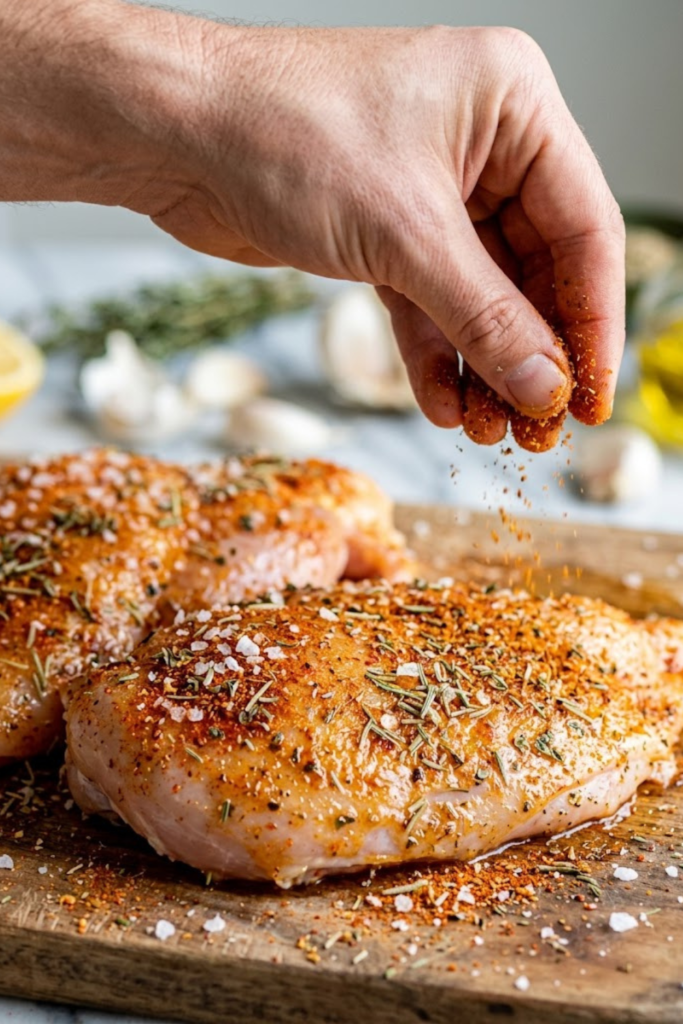
Before you even touch your spices, you need a binder. This is just a fancy word for something that helps the dry stuff stick to the meat. I always use avocado oil because it can take a lot of heat. Some oils start smoking and smell bad when they get hot, but avocado oil stays calm. I usually just use a tablespoon and rub it all over the chicken with my hands. You want every tiny spot covered so the heat can travel evenly across the surface. If you miss a spot, that part will stay soft and soggy, and nobody wants that. It feels a bit messy to get your hands oily, but it is the best way to make sure the seasoning stays put.
My Tiny Secret for Extra Crunch
Here is the trick that changed everything for me: cornstarch. I know it sounds like something you only use for thickening gravy, but it is magic for frying. I add about one teaspoon of cornstarch into my dry rub. When it mixes with the oil and the heat from the air fryer, it creates this very thin, glass-like crust. It is much lighter than using breadcrumbs, and it helps lock the juices inside the meat. I remember the first time I tried this; I was so surprised at how much it crunched. Just be sure you don’t use too much, or it can taste a bit like flour. A little bit goes a long way.
Building a Flavor Profile That Actually Pops
As for the spices, I like to keep it simple but strong. I use a lot of smoked paprika because it gives the meat a beautiful dark red color that looks like it came off a grill. Then I add garlic powder and onion powder for that savory taste that everyone loves. I also throw in some dried oregano and a tiny bit of cayenne pepper. Don’t worry, a little bit of cayenne won’t make it too hot for the kids; it just gives it a little “something special.” Mix all these in a small bowl first so you don’t end up with a big clump of one spice in one spot. Sprinkle it on high and rub it in well. When the chicken comes out, the smell will fill your whole house!
Mastering the Temperature and Timing
I used to think that the buttons on the front of my air fryer were just suggestions. I would just push the “chicken” button and walk away to fold laundry or check homework. But that is exactly how you end up with a dinner that tastes like a piece of old tire. To really nail this air fryer chicken breast with crispy edges and juicy center recipe, you have to be the boss of the clock and the heat. It is a bit like teaching a class of middle schoolers; if you don’t give them clear rules and watch them closely, everything goes wrong pretty fast.
Why Preheating Changes Everything
Most people think they can skip the preheat because the machine gets hot so fast compared to a big oven. I was one of those people for a long time! But I found out that if the basket isn’t already hot when you put the meat in, the chicken just sits there and gets warm slowly. This makes the juices leak out before the outside can even get a tan. Now, I always turn my air fryer to 400 degrees and let it run empty for at least five minutes before I start. You want to hear that “sizzle” the very moment the meat touches the metal grate. That sound is how you know you are on the right track for those crunchy edges.
Finding the Perfect Temperature
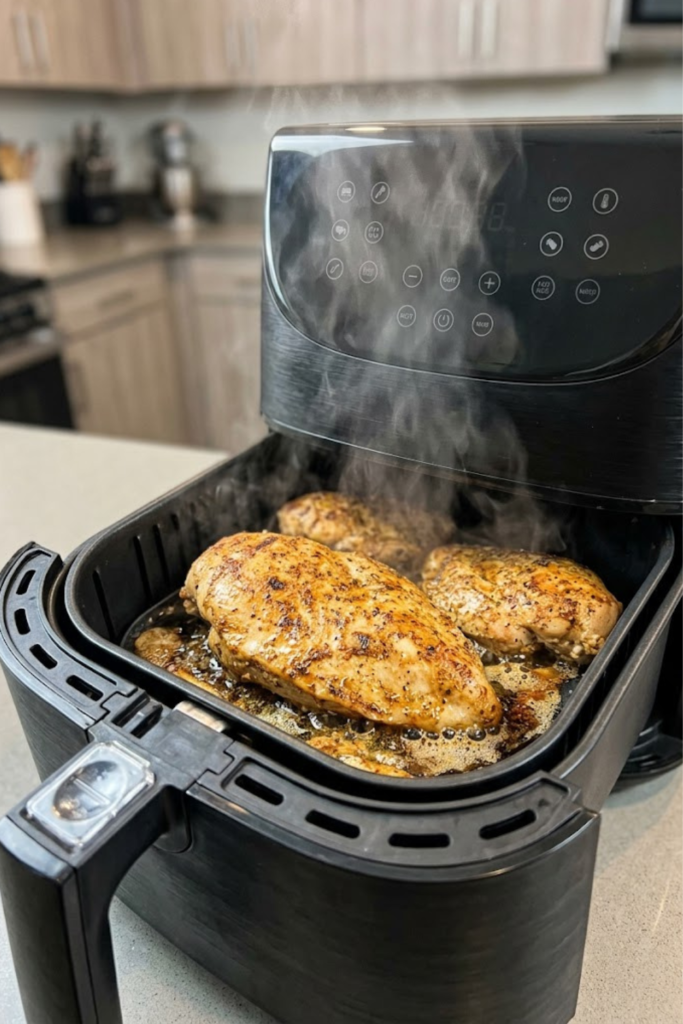
I have tried cooking chicken at 400 degrees for the whole time, but the outside gets too dark and bitter before the middle is safe to eat. After a lot of trial and error in my own kitchen, I found that 380 degrees is the sweet spot for most brands. It is hot enough to crisp up that cornstarch mix we made, but gentle enough that the inside stays soft and white. Usually, it takes about 12 to 15 minutes total for a normal-sized breast. Anyway, every machine is a little bit different. My friend has a different brand than mine, and her chicken always takes an extra two minutes. You have to get to know your own air fryer like a neighbor so you can make sure it works right.
The Flip and the Final Number
You can’t just leave the meat alone and hope for the best! I always set a timer for about six or seven minutes and then flip the chicken over. I use silicone tongs so I don’t scrape the seasoning off. The most important thing I can tell you is to buy a digital meat thermometer. Do not guess by looking at the color. If you cut into the meat to check if it is done, the juices will run out and you’ll be left with dry meat. I pull mine out when the screen says 160 degrees. The heat stays inside and brings it up to 165 while it sits on the counter. This is the only way I can ensure it stays juicy every single time.
Resting and Serving for the Best Results
The hardest part of this whole air fryer chicken breast with crispy edges and juicy center recipe is actually the very end. Once that timer dings and the smell of toasted garlic and paprika fills your kitchen, you are going to want to grab a fork and start eating right away. I have had my kids standing around the counter like a pack of hungry wolves, just waiting for me to put the plate down. But if you want the meat to be actually good, you have to be the boss and make everyone wait. I learned this the hard way when I used to cut the chicken as soon as it came out. All the liquid would just pour out onto the cutting board, and the meat would turn dry in seconds. It was a real waste of all that hard work.
The Five-Minute Waiting Rule
You have to let the chicken rest. I tell my students that even meat needs a “recess” after working hard in the heat. When the chicken cooks, the fibers get tight and squeeze out the juices. If you let it sit on a warm plate for about five to eight minutes, those fibers relax and soak the moisture back up. I usually just throw a piece of aluminum foil over the top of the plate—don’t wrap it tight or you will lose those crispy edges—and set a timer. This little break makes the difference between a dinner that is okay and one that people actually talk about. It gives me just enough time to finish up a salad or set the table properly.
Slicing Against the Grain
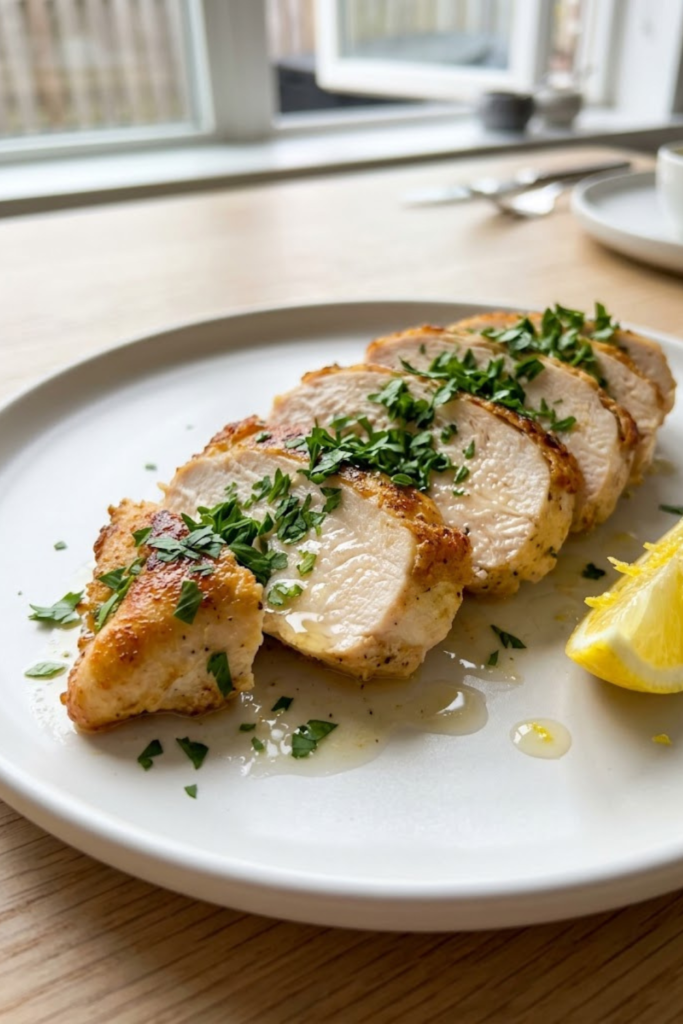
When it is finally time to eat, how you cut the meat matters just as much as how you cook it. If you look closely at the chicken, you will see tiny lines running in one direction. That is the “grain.” You want to take your knife and cut across those lines, not with them. This makes the pieces much easier to chew and keeps them feeling tender in your mouth. If you cut the wrong way, even a perfectly cooked piece of meat can feel a bit stringy. I always try to make nice, even slices about half an inch thick. It looks much better on the plate and makes the meal feel a bit more special than just a plain hunk of meat.
Simple Pairing Ideas for 2026
I usually serve this with something green to keep things healthy. Since the air fryer is already out, I often toss some broccoli florets or asparagus in there right after the chicken comes out. They only need about five or six minutes to get some nice charred bits on them. My husband likes it over a bed of fluffy quinoa or brown rice, which is great for soaking up any extra flavor. Sometimes, if I am feeling fancy, I will squeeze a fresh lemon wedge over the chicken right before we eat. The bright acid really makes the savory spices pop. This recipe has become a staple in my house because it is fast, simple, and actually tastes like I spent all day in the kitchen.
Why This Recipe Will Be Your New Weeknight Favorite
I hope this helps you feel more confident about making an air fryer chicken breast with crispy edges and juicy center recipe for your own family. I know how stressful it can be to stand in the kitchen after a long day of teaching or working, just hoping that the meal you are making won’t end up in the trash can. I have been there more times than I want to admit! But once you get the hang of these simple steps, you will see that you don’t need a fancy chef’s degree to make food that tastes like it came from a high-end restaurant. It is all about those small habits, like drying the meat and letting it rest, that turn a boring dinner into something special.
I really think that the air fryer is one of the best tools we have in 2026 for eating better without losing all our free time. My husband and I have saved so much money on takeout since I figured out how to get that perfect crunch at home. Plus, I feel a lot better knowing exactly what spices and oils are going into our bodies. If you have some friends who are always complaining about dry, tasteless poultry, you should definitely send them this way. It is a great feeling to share a “win” in the kitchen with people you care about.
If you found these tips helpful, I would be so happy if you could share this recipe on Pinterest. It helps other home cooks find these tricks, and it keeps me motivated to keep sharing my kitchen experiments with all of you. I love seeing photos of how your chicken turned out, so please let me know if those crispy edges were as good as I promised! Cooking doesn’t have to be a scary chore; it can be a fun way to take care of yourself and your loved ones. Now, go grab your air fryer and get started on the best chicken you’ve had in years. I promise your family is going to be asking for seconds before you even sit down!