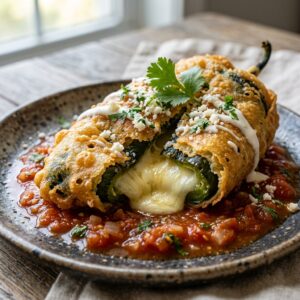
Did you know that 72% of home cooks say chicken is their “reliable but boring” fallback? Let’s change that! I’ve spent years trying to make poultry exciting, and let me tell you, this creamy roasted garlic chicken breast is the game-changer you’ve been waiting for! It’s savory, it’s velvety, and honestly, it’s a little bit magical. You’re going to love how the sweet, mellow garlic melts right into the heavy cream. Seriously, prepare to lick the plate clean!

The Secret to Perfect Slow-Roasted Garlic
I’ll tell you right now, I used to be pretty scared of garlic. The first time I tried making this creamy roasted garlic chicken breast, I didn’t realize that raw garlic and roasted garlic are like two totally different animals. I chopped up about ten cloves and threw them in the pan like a crazy person. My whole house smelled like a vampire’s nightmare for a week! Plus, the sauce was so sharp it almost made my eyes water. It definitely wasn’t the cozy, comforting dinner I was hoping to put on the table.
Why We Roast Instead of Sauté
Roasted garlic is really what makes this meal special. When you roast a whole head of garlic, the heat changes the chemistry inside those little cloves. It takes that “bite” away and turns it into something sweet, mellow, and buttery. Some people call it kitchen gold, and they aren’t kidding! If you just sauté garlic in a pan, it stays pungent and can burn fast if you look away for even a second. But when it’s roasted, it gets soft enough to mash with a back of a fork. This is the big secret to getting that deep flavor in your creamy roasted garlic chicken breast without it being too “garlicky” or harsh on your breath.
Getting the Temperature Just Right
One big mistake I see all the time is people cranking the oven to 400 degrees because they’re in a rush to eat. Please don’t do that. High heat makes the garlic bitter and crunchy, which will totally ruin your sauce later. I usually keep my oven at 325 degrees. I slice the top off the garlic bulb so the cloves are peeking out, drizzle on some olive oil, and wrap the whole thing in a bit of foil. Let it sit in there for about 45 minutes. You’ll know it’s ready when your kitchen smells amazing and the cloves feel soft, like room-temperature butter, when you give them a little squeeze.
The Squeeze and Mash Trick
Once the bulb is cool enough to touch, you just squeeze the bottom and the cloves pop right out like magic. I once tried to mash them directly into the pan while they were still in the skins—what a total mess! I spent twenty minutes fishing out papery bits while my chicken got cold. Now, I always squeeze them into a small bowl first and mash them into a smooth paste. This paste is what you stir into your heavy cream. It blends in perfectly, making sure every single bite of your creamy roasted garlic chicken breast is smooth and full of that mellow, roasted goodness. It really is worth the extra time!

Achieving the Ultimate Velvety Cream Sauce
Let’s talk about the sauce for this creamy roasted garlic chicken breast. This is usually the part where most home cooks get a little nervous. I know I did! For the longest time, my cream sauces would either turn into a weird oily mess or stay way too watery, like I was just eating warm milk. It took me quite a few “failed” dinners to realize that a great sauce isn’t just about the ingredients—it’s about how you put them together in the pan.
Don’t Waste Those Pan Bits
Once you take your seared chicken out of the skillet, you’re going to see a bunch of brown bits stuck to the bottom. Whatever you do, don’t go washing that pan yet! Those bits are called “fond,” and they are packed with savory flavor. I usually pour in a splash of chicken broth or maybe a little bit of white wine if I have an open bottle. Use a wooden spoon to scrape the bottom while the liquid bubbles. This process is called deglazing. It pulls all that concentrated chicken flavor into the liquid, which becomes the foundation for your creamy roasted garlic chicken breast sauce. If you skip this, your sauce will taste fine, but it won’t have that deep, professional flavor.
The Secret to No-Curdle Cream
Now, adding the heavy cream is where things can get tricky. If your pan is screaming hot and you dump cold cream in, it might break or curdle. I’ve made that mistake more times than I’d like to admit. Nowadays, I always turn the heat down to medium-low first. I pour the cream in slowly and keep stirring. You want to let it simmer gently, not boil like crazy. As it heats up, the water in the cream evaporates, and the sauce naturally gets thicker and more velvety. This is the stage where you stir in that mashed roasted garlic we talked about earlier.
Finishing with Flavor and Texture
To really finish it off, I like to stir in a small handful of freshly grated parmesan cheese. The cheese melts into the sauce and gives it a bit of a salty “pop” while helping it stay thick. Throw in some fresh thyme or chopped parsley right at the end for some color. You want the sauce to be thick enough that when you pull a spoon through it, it leaves a little trail. When you pour that over your chicken, it stays right where it’s supposed to be instead of running all over the plate. It’s so good you might be tempted to just eat the sauce with a spoon!

Avoiding Dry Chicken Every Single Time
Let’s be honest, there is nothing worse than sitting down for a nice meal and realizing your chicken is basically a piece of cardboard. I’ve been there way too many times! When I first started making this creamy roasted garlic chicken breast, I’d get the sauce perfect, but the meat would be so dry I’d need a gallon of water just to swallow a bite. It was pretty embarrassing, especially when I had friends over. Over the years, I figured out a few tricks that changed everything for my kitchen game.
Give Your Chicken a Good Pound
The biggest problem with chicken breasts is that they are shaped like a teardrop—fat at one end and skinny at the other. If you just throw them in the pan like that, the skinny part turns into jerky by the time the fat part is actually cooked. Now, I always put my chicken between two pieces of plastic wrap and give it a good whack with a heavy skillet or a meat mallet. You don’t need to go crazy on it, just get it to an even thickness. This makes sure every part of your creamy roasted garlic chicken breast cooks at the exact same speed. It’s a bit loud, but it’s a total lifesaver for the texture.
Trust Your Thermometer, Not Your Eyes
I used to think I could tell if chicken was done just by poking it or looking at the color. Boy, was I wrong! I ended up overcooking it every single time because I was scared of it being raw. Now, I use a meat thermometer. The “official” rule is 165°F, but here is a little secret: I pull my chicken out of the pan when it hits 160°F. The temperature keeps rising a few degrees even after you take it off the heat. This is called carryover cooking. If you wait until it’s 165°F in the pan, it’ll probably hit 170°F by the time you eat it, and that’s when it starts getting tough.
The Five-Minute Rest Rule
This is the hardest part for me because the creamy roasted garlic chicken breast smells so good I just want to dive in. But you have to wait! If you cut into the meat right away, all those delicious juices just run out onto the plate, leaving the meat dry. I let mine sit for at least five minutes. This lets the fibers in the meat relax and soak those juices back in. It’s the difference between a “meh” dinner and one that tastes like it came from a five-star restaurant. Trust me, those five minutes of patience are worth it.

Bringing It All Together at the Table
Well, there you have it! We have covered a lot of ground today, from the slow magic of the oven to the science of a perfect sauce. I know it might seem like a lot of steps just for a piece of meat, but I promise that once you take that first bite of your creamy roasted garlic chicken breast, every single minute will feel worth it. There is something really special about making a meal from scratch that looks and tastes like it belongs in a fancy restaurant. It makes you feel like a total pro in your own kitchen, and honestly, that’s a feeling I want every single one of my students—and readers—to have.
When you serve this up, I really recommend putting it over something that can soak up every drop of that sauce. My personal favorite is a big pile of buttery mashed potatoes. You can even take a little bit of that extra roasted garlic paste and stir it right into the potatoes for a double dose of flavor! If you aren’t a potato fan, a simple plate of pasta or even some crusty bread works wonders too. Just make sure you don’t let any of that creamy goodness go to waste. It’s too good to leave behind on the plate!
I really hope this guide helps you feel more confident next time you pick up a skillet. Cooking isn’t about being perfect; it’s about learning what works and enjoying the process. Even if your sauce is a little thin the first time or your garlic gets a bit too dark, just keep going. Every time you make this creamy roasted garlic chicken breast, you’ll get a little bit better at it. Soon enough, you won’t even need to look at these notes because you’ll just know the rhythm of the recipe by heart.
If you enjoyed making this or if it helped you save a Tuesday night dinner, please share it on Pinterest! It helps other people find these tips, and I love seeing how your dishes turn out. Go ahead and take a photo of your masterpiece before you eat it—you deserve to show off a little bit! Happy cooking, and I’ll see you in the next lesson!